Connect your PHP application with Azure Blob Storage for file storage and media streaming and enjoy the benefits of decoupled file systems and automated CDN delivery.
I want to go over the steps to use Azure Blob Storage in your PHP applications for storage of files, archives, and media objects. Azure Blob Storage is a scalable and secure storage system that provides high-performance access to your data in the cloud.
Requirements
- PHP application with file upload form
- An Azure Subscription, sign up for a Free account if you don’t have one
- A file to upload
I will be using the Microsoft PHP library “microsoft/azure-storage-blob” to access Azure Blob Storage and upload files.
composer require --sort-packages --optimize-autoloader --with-all-dependencies microsoft/azure-storage-blobThe documentation for this package is limited, therefor I want to provide some additional context around the features this package offers.
1. Create an Azure Storage Account
I won’t spend too much time on how to set up an Azure Storage Account, it is not the focus of this tutorial. However, there is an important setting you need to understand well before continuing: Public Access of the storage account.
If you use this storage account for internal use, it should be turned off. If you need public (internet) access to the items on this storage account, create a new storage account for this purpose only.
Azure Storage Account service are billed, so make sure that you clean up (destroy) the service after this tutorial!
2. Install the blob storage package
Microsoft has provided a Composer Package called “microsoft/azure-storage-blob” (see requirements) that will provide all required functionality to interact with Azure Blob Storage REST API. In this tutorial I will use this package intensively.
I will create a service class that will provide the features I want when interacting with the Azure Storage Account.
<?php
declare(strict_types=1);

namespace AzurePHP\Service;

use MicrosoftAzure\Storage\Blob\BlobRestProxy;

class AzureBlobService
{
    private BlobRestProxy $blobClient;

    public function __construct(BlobRestProxy $blobClient)
    {
       $this->blobClient = $blobClient;
    }
}
3. Get access key for storage
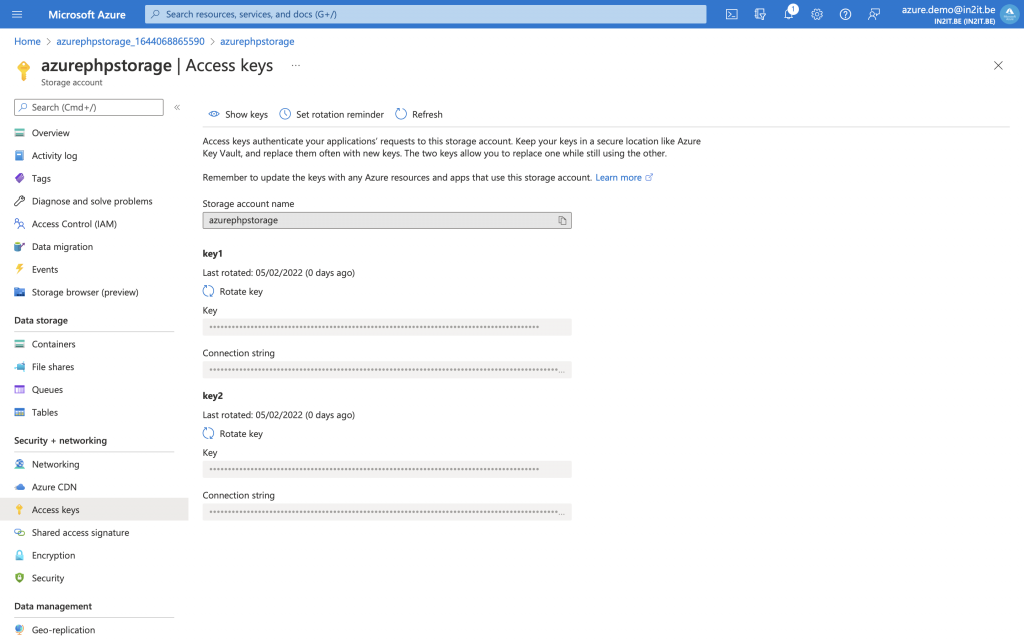
Before we can interact with the created storage account, we need to retrieve an access key.
If you worked with Microsoft products and services before, you probably know about “Connection Strings”. For those who are not familiar, a “Connection String” is comparable to the DSN string used with PDO where in one string all necessary key and values are provided, instead of having each element separate.
It takes the form of “DefaultEndpointsProtocol=%s;AccountName=%s;AccountKey=%s” which can be copied directly from the Azure Portal. We will store this value in an environment variable called STORAGE_CONN_STRING.
The BlobRestProxy requires this Connection String to authorize and establish the connection with the storage account. With it, I can initialize this service class by injecting the client into the constructor.
I will create an index.php file in the public folder, the entry point of my example web interface.
<?php
declare(strict_types=1);

use AzurePHP\Service\AzureBlobService;
use MicrosoftAzure\Storage\Blob\BlobRestProxy;

require_once __DIR__ . '/../vendor/autoload.php';

$connectionString = getenv('STORAGE_CONN_STRING') ?: '';
if ('' === $connectionString) {
    throw new InvalidArgumentException(
        'Please set the environment variable STORAGE_CONN_STRING with the Azure Blob Connection String'
    );
}
$blobClient = BlobRestProxy::createBlobService($connectionString);
$blobService = new AzureBlobService($blobClient);
4. Create a container
In order to store files in Azure Blob Storage, you need to create a container first. Consider such a container as a logical space or a label where your files will reside.
In our AzureBlobService class we provide the following code that will allow us to create an Azure Blob Storage container.
public function addBlobContainer(string $containerName): void
{
    $this->blobClient->createContainer(strtolower($containerName));
}
Containers in Azure Blob Storage can only contain lowercase letters, we use strtolower PHP function on the container name.
5. Secure the container
By default, files within a container are not accessible from the outside. This is fantastic news because it prevents a situation where something confidential was uploaded and the whole world was able to access it. For static files like images, movies, css, and javascript this default setting is not convenient. Luckily there are 3 access levels you can choose from:
- NULL: no public access allowed
- blob: only the file is accessible if you have the link to it
- container: all files are accessible and can be iterated over
For security reasons the “blob” setting is the preferred access level. Below I define the access control for the container.
public function setBlobContainerAcl(string $containerName, string $acl = self::ACL_BLOB): bool
{
    if (! in_array($acl, [self::ACL_NONE, self::ACL_BLOB, self::ACL_CONTAINER])) {
        return false;
    }
    $blobAcl = new ContainerACL();
    $blobAcl->setPublicAccess($acl);
    $this->blobClient->setContainerAcl(
        strtolower($containerName),
        $blobAcl
    );
    return true;
}
I’m using a new ContainerACL object to set the access level for the container. Next I attach this ContainerACL object to my container.
6. Upload a file in the container
Now that my container is created and accessible the way I want it, I can start uploading files to it.
public function uploadBlob(string $containerName, array $uploadedFile, string $prefix = ''): string
{
    $contents = file_get_contents($uploadedFile['tmp_name']);
    $blobName = $uploadedFile['name'];
    if ('' !== $prefix) {
        $blobName = sprintf(
            '%s/%s',
            rtrim($prefix, '/'),
            $blobName
        );
    }
    $this->blobClient->createBlockBlob(strtolower($containerName), $blobName, $contents);
    $blobOptions = new SetBlobPropertiesOptions();
    $blobOptions->setContentType($uploadedFile['type']);
    $this->blobClient->setBlobProperties(
        strtolower($containerName),
        $blobName,
        $blobOptions
    );
    return $blobName;
}
In this routine I’m providing the name of the container, the file I’m uploading (using the $_FILES array variable directly) and an optional prefix.
This prefix is a label that can be applied on the file you’re uploading and can take the form of a directory structure. Imagine you need to upload 3 versions of an image for desktop, tablet and mobile. I create a container “media” and the image name is “hero-image.png”. I could rename the files into “hero-image-desktop.png”, “hero-image-tablet.png”, and “hero-image-mobile.png”, but with the prefix I can now upload them as “desktop/hero-image.png”, “tablet/hero-image.png”, and “mobile/hero-image.png”.
7. Provide a user interface
I have a very basic HTML form that allows me to upload a file to the Azure Blob Storage.
<html>
<head>
    <title>Upload a file to blob storage</title>
    <style type="text/css">body { font-size: x-large; width: 800px; margin: 40px auto; text-align: center; }</style>
</head>
<body>
<form method="post" action="/" enctype="multipart/form-data">
    <label for="upload-file">File to upload</label>
    <input type="file" id="upload-file" name="blob">
    <input type="submit" value="Upload">
</form>
</body>
</html>
Which gives me a convenient form to upload my file. If I run the web page using the built-in PHP webserver, I can start testing the upload functionality.
STORAGE_CONN_STRING="<copy from portal>" php -S localhost:9000 -t public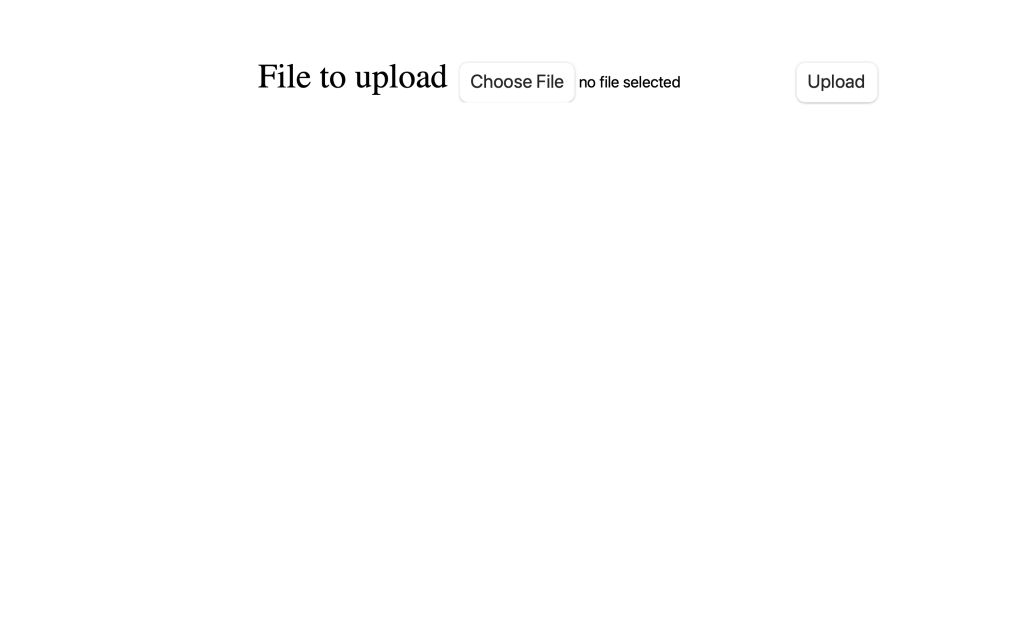
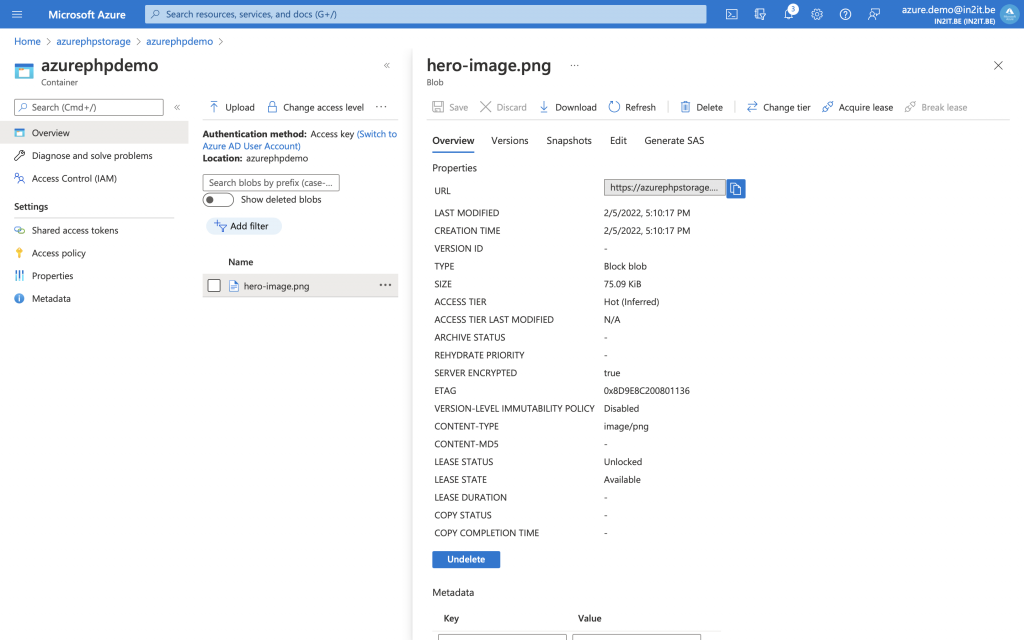
And when I check my container in Azure Portal, I can see the file is uploaded and available in the blob storage.
You can find the source code on GitHub: https://github.com/AzurePHPDev/azure-blob-storage-demo.
I covered the steps required for uploading files to Azure Blob Storage. In a next tutorial I will talk a little about the project AzureBlob which provides a file management on top of Azure Blob Storage.

Great Article….Can we use Service principal (client id,client secret) for azure authentication instead of connection string?
People have asked me about showcasing access through Service Principal accounts and secured connections provided by Azure Key Vault. I need to find some time to write out an article addressing both use cases.